October 13, 2023
With all of the flooding we’ve been seeing in NYC this Fall, we thought we’d share a few tips on how to cure those pesky leaky basements!
History of New York City Townhouse basements
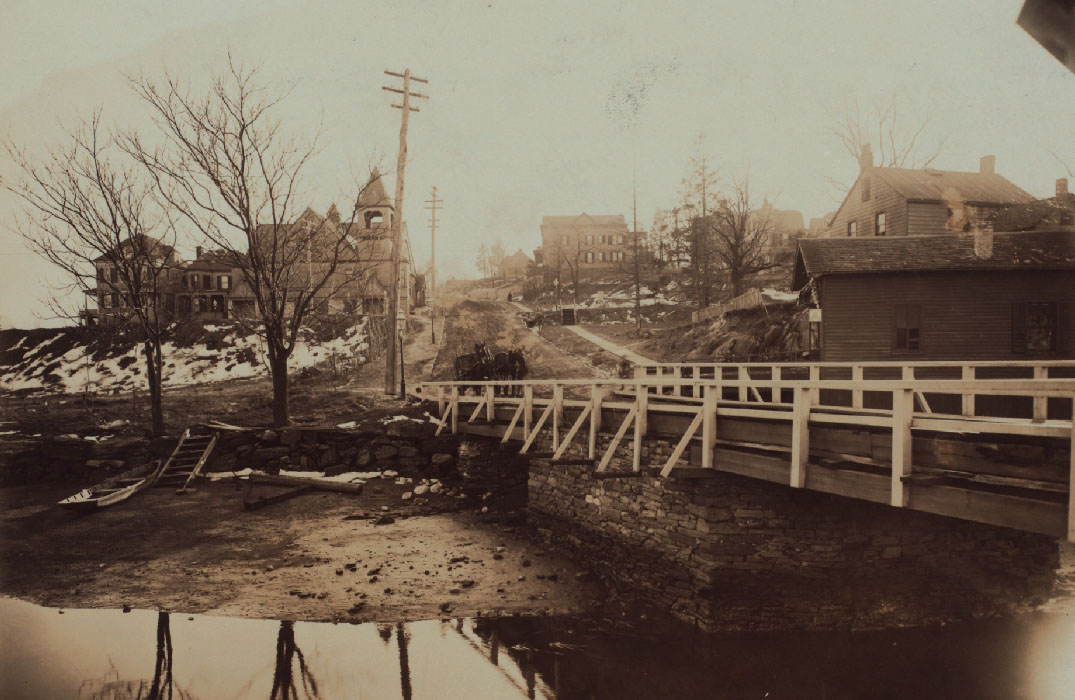
Prior to the advent of easy, commercially available concrete, townhouse foundations in NYC were usually constructed of stone that was locally available and easy to transport to the site without advanced machinery. Transporting materials with horse-drawn carriages was the norm in the late 1800s, as seen in the image below!
Called “rubble wall” foundations, these walls are incredibly strong and built to last for hundreds of years. To create the foundation, stone and mortar was stacked on site, creating a strong base for the cut stone or brick facades that made up the structure in the levels above ground.
Why do townhouse basements leak?
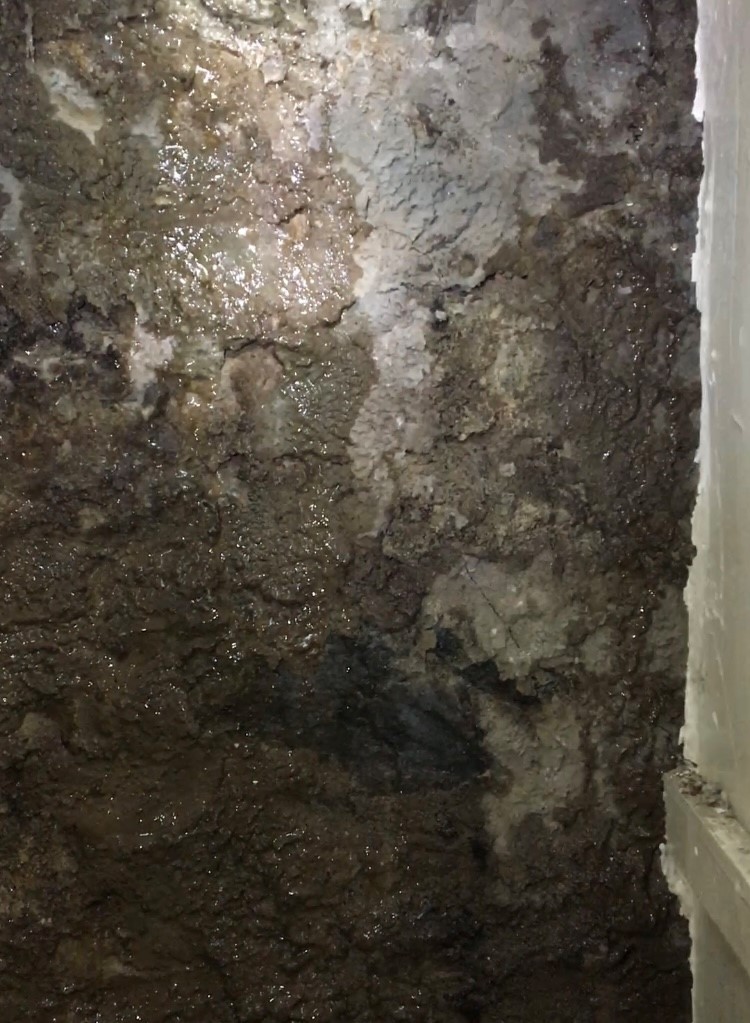
Though strong and durable, these walls are often not waterproofed from the exterior, as the technology for waterproofing membranes did not exist at the time to provide a fully-sealed envelope to resist the immense pressure of water that gets exerted on the foundation walls underground. Called “hydrostatic pressure”, this force will eventually break down the mortar and joints between stones and will push water through every single opening that it can find, leading to surface water on your interior walls and eventually moldy, damp, and wet basements.
What happens when water gets into your basement?
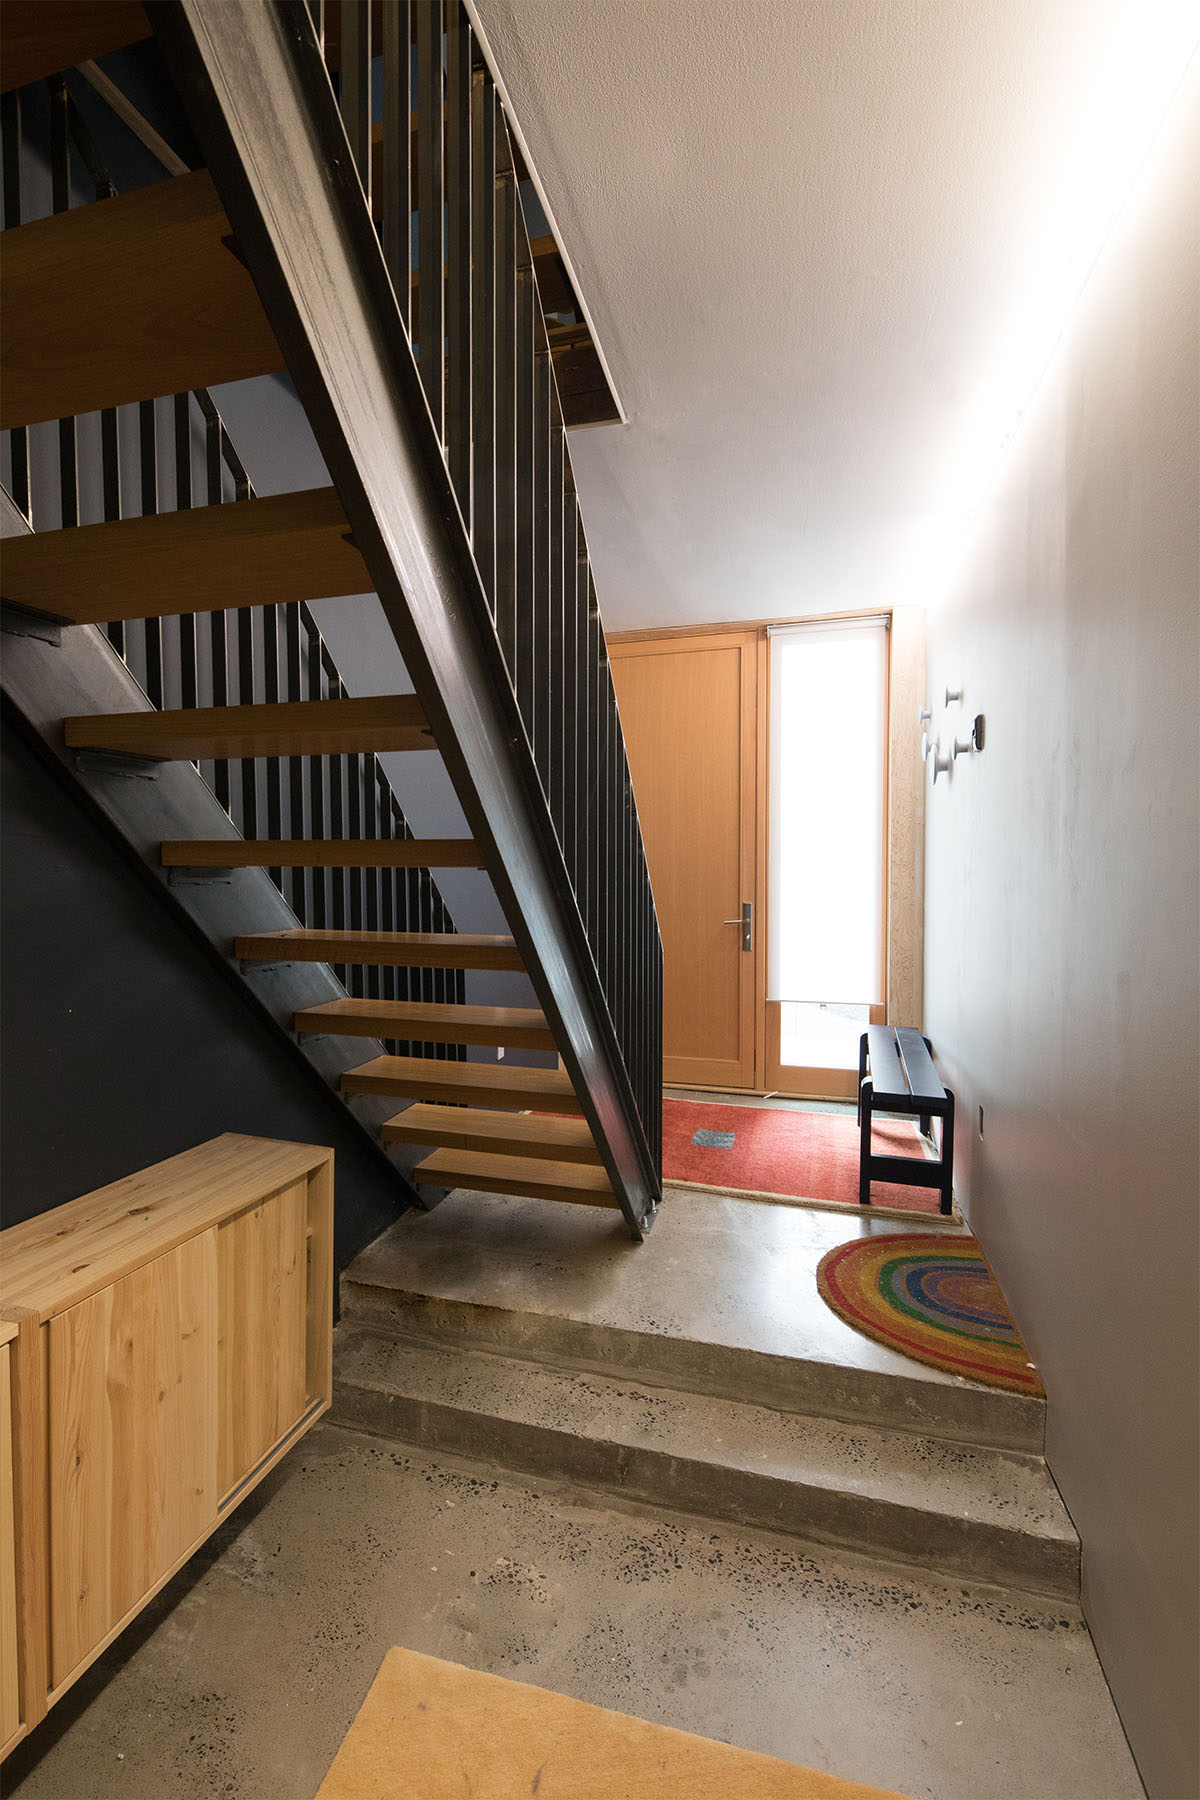
Though in the early days of New York, leaky townhouse basements may not have mattered much, as they were not frequently inhabited or used for much other than storage or mechanical spaces. As property values have increased, however, and the city has grown, more and more people are turning to their basements to create valuable, usable space, whether for a home office, recreation / playrooms, or even for auxiliary bedrooms and living spaces (if the conditions for light and air allow it, such as in the photo above!)
Rot, mold, and smells are all problems that will inevitably result from leaky basements that are not cured properly.

How can we prevent leaky basements?
In an ideal scenario, a new waterproofing membrane system can be applied on the outside of the basement walls (as shown in our Carolina Shaker Farmhouse basement above), keeping the water away from your basement even before it has a chance to come in contact with the wall. Though this is the norm in new construction, it is often not possible in existing construction or in spaces where it would be cost prohibitive to dig up your yard, or even impossible in some urban sites with neighbors on either side.

What can I do if I can't dig up my yard to waterproof the exterior?
Our philosophy for waterproofing existing wet townhouse basements in a cost-effective way is simple: allow the water to come through the wall, control it, drain it, and then create a separate “dry layer” that is the actual interior space.
We have seen numerous leaky basement “fixes” that end up just being band-aid solution that will inevitably fail due to the immense pressure of water against the wall. For example, adding a “scratch coat” layer of concrete or stucco, or just “painting” a layer of waterproofing directly on the foundation wall. Both of solutions will inevitably fail because water will find a way through, and then it will begin to crack the new layer until you have wet walls once again. Water always wins in this scenario.

What are the steps to fix a leaky basement?
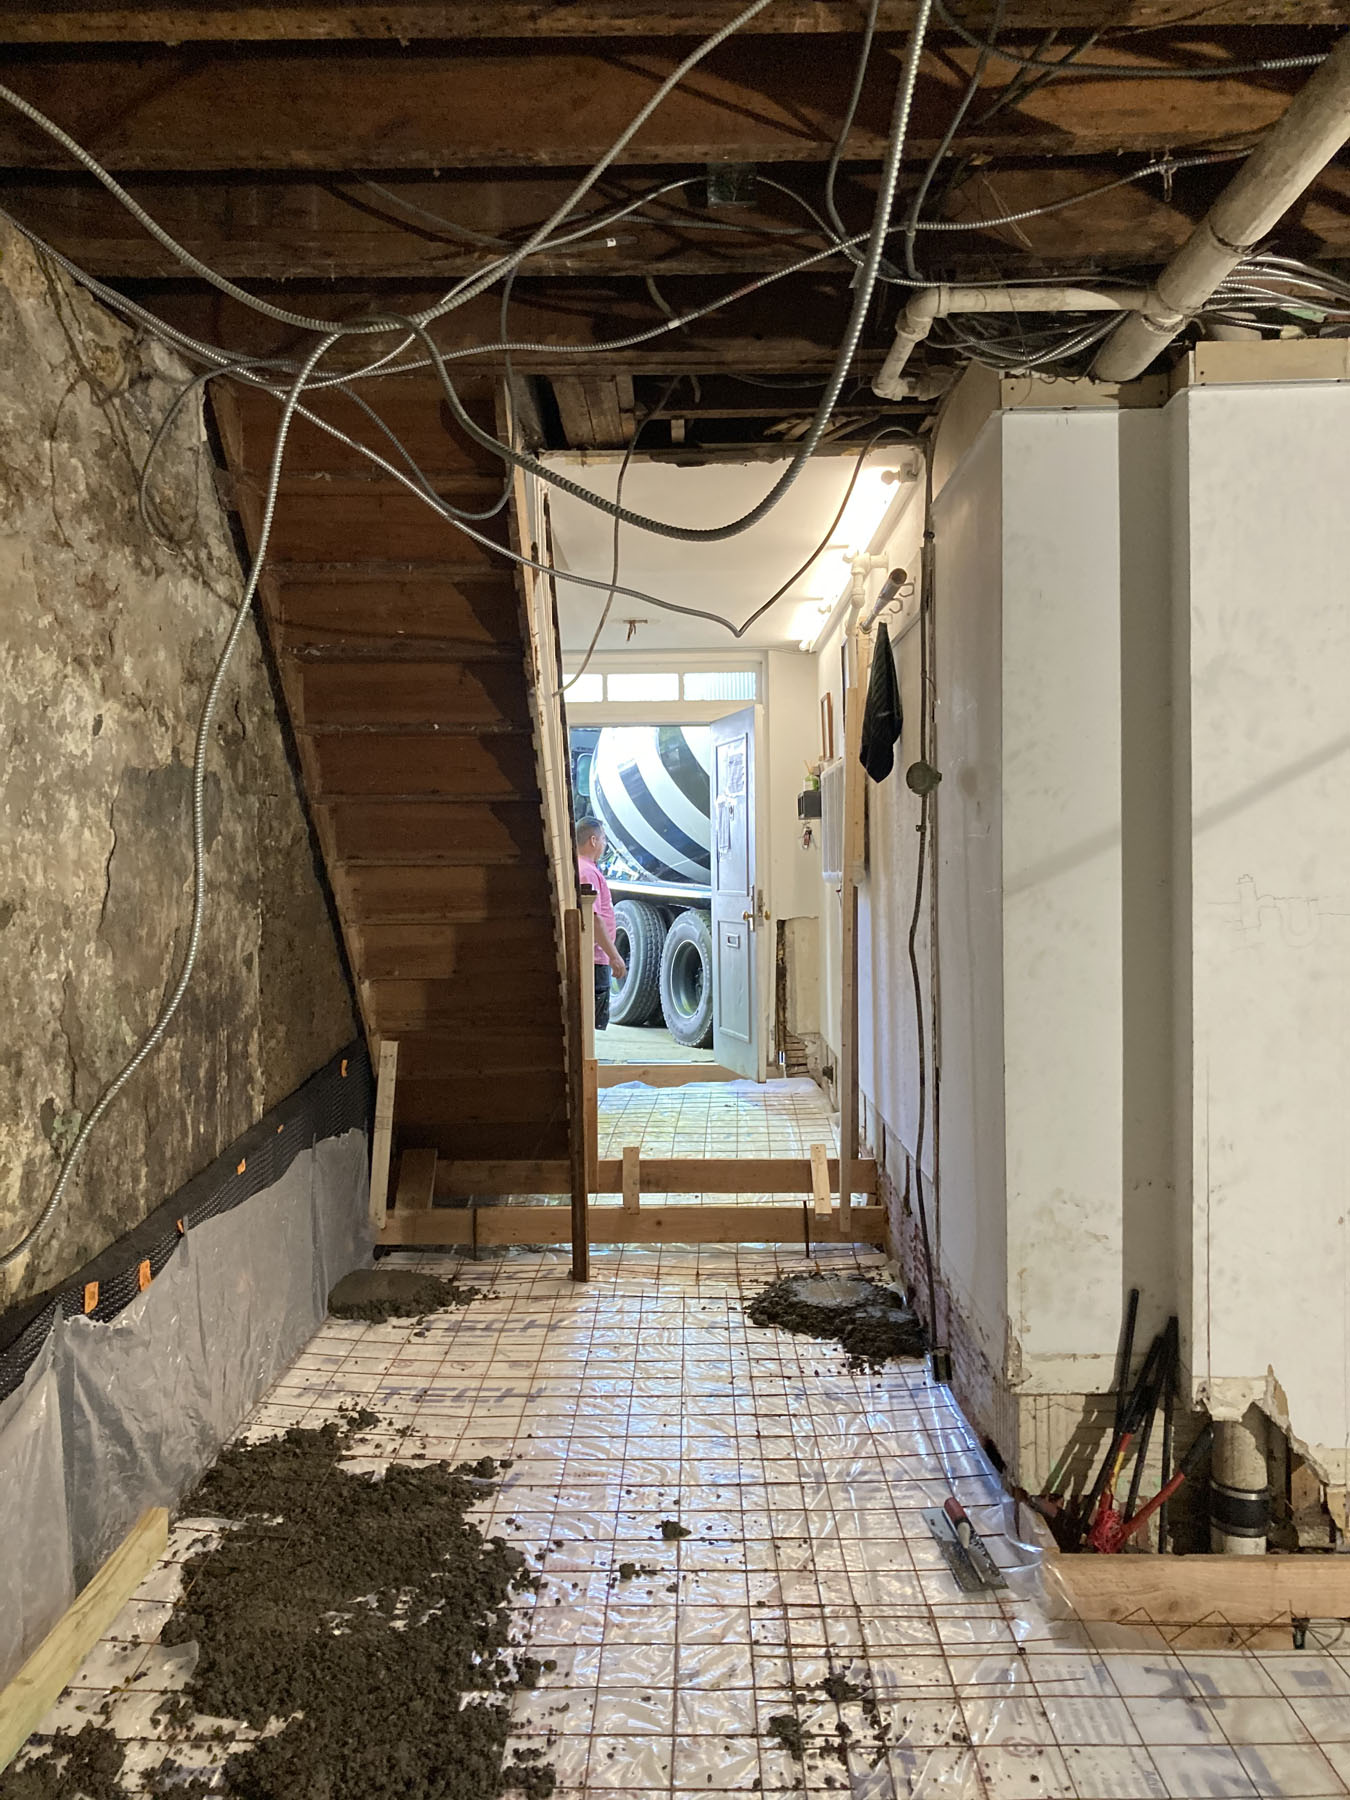
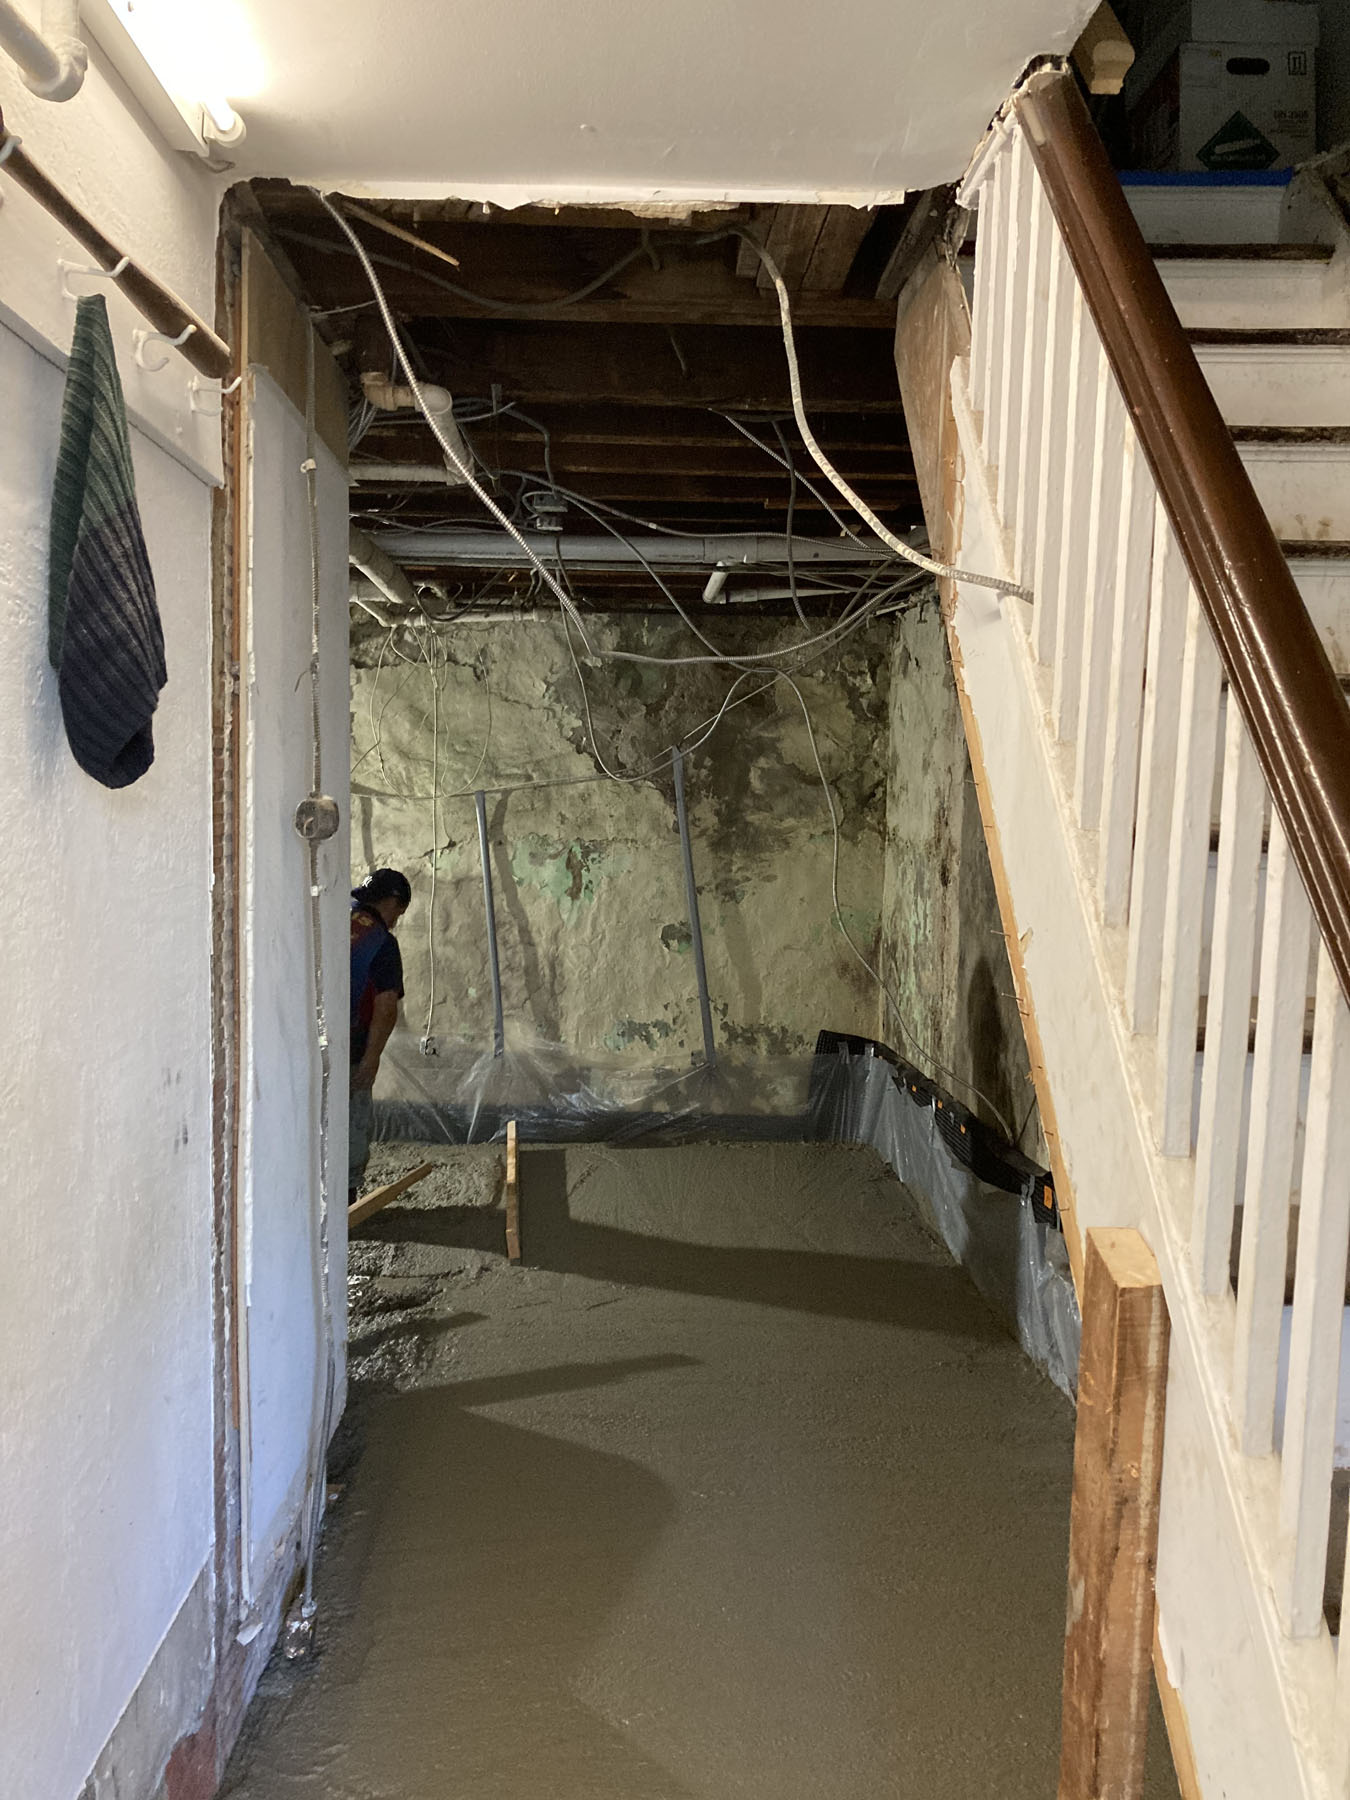
What we advocate for is a multi-layer solution. First you need to have a drainage plan. If there is no trench drain installed in the basement, it’s usually best to lay a pipe around the perimeter that is pitched to either a sump pump or directly into the city’s storm system, if the pitch will allow. This may require some digging if there is already a slab, but having a perimeter drain installed is the best insurance you can have against future wet / flooded basements. That water has to go somewhere.
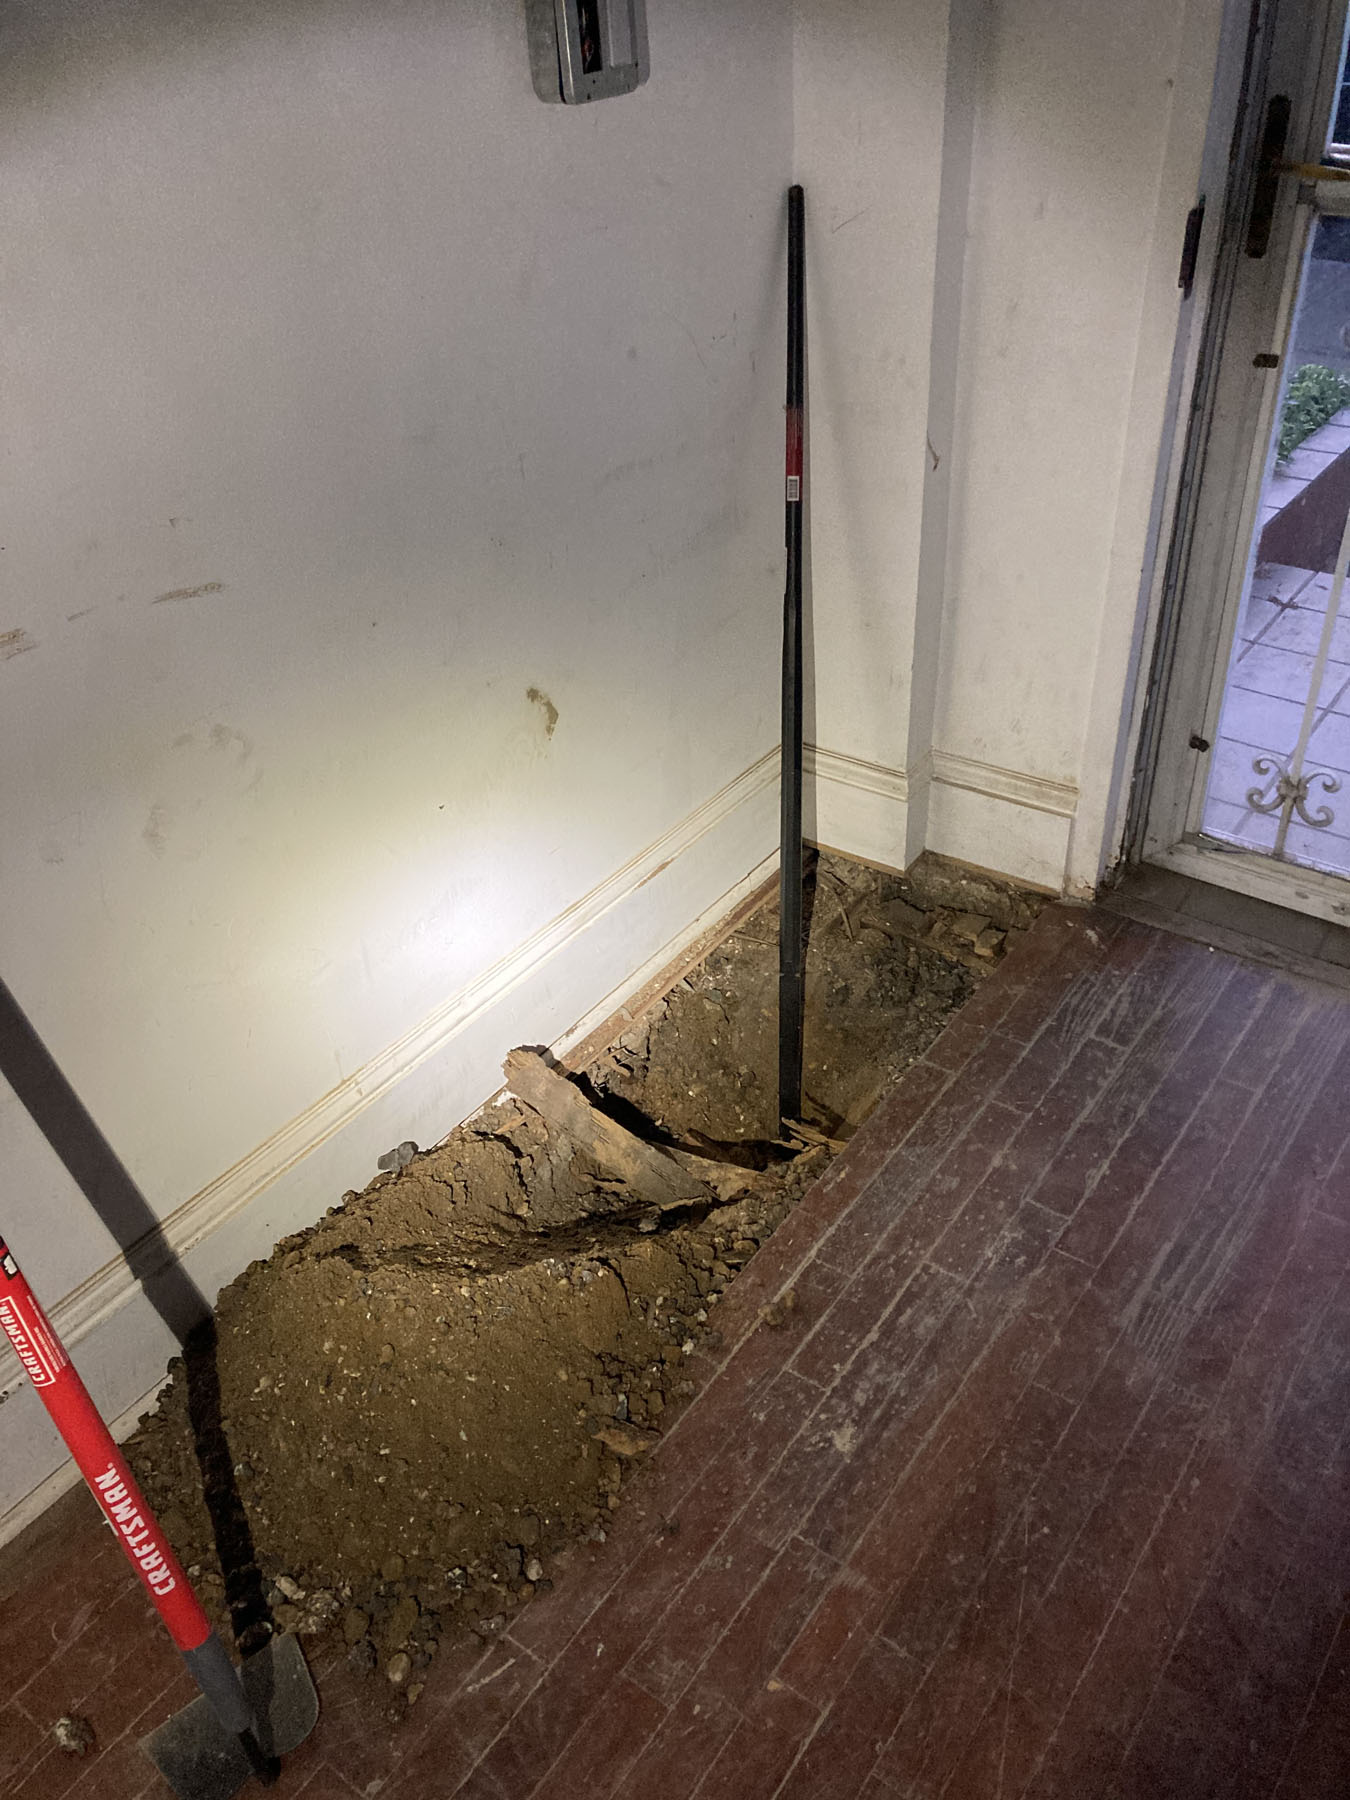
Above is an example of our Manhattan Townhouse renovation, where we discovered that there was never a slab installed. The flooring had been essentially laid directly on top of planks and “sleepers” over a dirt floor. Needless to say, water through the walls and from the ground quickly rotted the sleepers, subfloor, and flooring, so we put in a drainage system and poured a new slab.

After installing a drainage system, (and patching as required) we recommend waterproofing the wall from the inside as a first layer of defense. There are numerous products out there to achieve this. We have used Dri-Lock with some success, but our gold standard product that we can recommend is from Koster waterproofing systems. It is a paint-on membrane that will crystallizes when it comes in contact with water, creating a hard, waterproof layer with minimal risk of failure.
After waterproofing the wall, we recommend installing a “dimple mat” with the filter fabric side attached to the wall surface to help protect and preserve an interior drainage plane for any water that may work it’s way through the wall. A dimple mat is a composite material membrane with surface dimples that create little drainage channels down the wall, and the filter fabric on one side helps trap any particles of dirt or moisture that could travel with the water and potentially clog up the drainage plane. These rubble foundations often have a lot of particulate that can find its way through and clog up the drainage, so the filter fabric is a good insurance policy against this potentially damaging action of water along the wall. Typically dimple mats are installed on the exterior surface of a basement to protect the drainage channels from dirt on the outside wall, but the same principles can be utilized on the interior side of the wall.
The dimple mat should be installed up the wall as high as possible, and attached with washers (or the proprietary system) to minimize the risk of fastener pullout and punctures of the waterproofing membrane and dimple mat. In some cases where the basement is not completely underground, it may not be necessary to run the dimple mat all the way to the ceiling, but usually the base of the wall is the riskiest area for drainage anyway so the highest priority is having the fabric protect the most “trafficked” space for water and debris along the wall.
After installing the dimple mat, we like to use a layer of spray foam to really seal up every square inch of the basement. Spray foam works extremely well in basements for a few reasons. Not only is it a great insulator for temperature through the wall, but it also functions as a great waterproofing barrier as well as a vapor barrier for moisture and humidity through the wall. As long as you are using “closed cell” spray foam insulation, it can serve this dual purpose. Spray foam dries to a hard, tough shell, so the concept is that if any water happens to work its way through the first two layers of waterproofing (membrane and dimple mat) the spray foam will form a third solid layer of waterproofing separating the damp wall from your dry interior space. We always try to get the spray foam up into the floor joists and rim joists of the floor above, and we try to get it sealed to the slab of the basement, creating a 100% water and moisture-proof layer.
After this assembly is complete, you should have a completely dry basement, but we usually still recommend the use of metal studs in basements, to prevent any potential mold/mildew/rot issues with wood 2X studs, and we like to finish out basement spaces with mold tough sheetrock.
Check out our Work With Us page to set up a site visit with our principal architect Matt today. He will visit your home to survey your existing basement conditions and determine if the solution described above (or another similar custom solution) would be a good fit for your space. We can then help prepare an estimate of construction costs, getting you one step closer to a clean dry basement!